
Project : ELK Stack
How Elasticsearch and Rsyslog can HELP you with centralized logging

Akshay Haste
→ Project Details
"ELK" is the acronym for three opensource projects: Elasticsearch, Logstash, and Kibana. Elasticsearch is a search and analytics engine. Logstash is a server side data processing pipeline that ingests data from multiple sources simultaneously, transforms it, and then sends it to a "stash" like Elasticsearch. Kibana lets users visualize data with charts and graphs in Elasticsearch.
What is Elasticsearch?
Elasticsearch is a distributed, free and open search and analytics engine for all types of data, including textual, numerical, geospatial, structured, and unstructured. Elasticsearch is built on Apache Lucene
What is Kibana?
Kibana is an free and open frontend application that sits on top of the Elastic Stack, providing search and data visualization capabilities for data indexed in Elasticsearch.
So, Using Rsyslog facility we can send log to ELK
Using this open source tool (ELK) and Rsyslog we can make power full and secure centralized logging system
→ Prerequisite
- CentOS Linux 7.9
- Elasticsearch
- Java 1.8
- Kibana
- Logstash
→ Summary
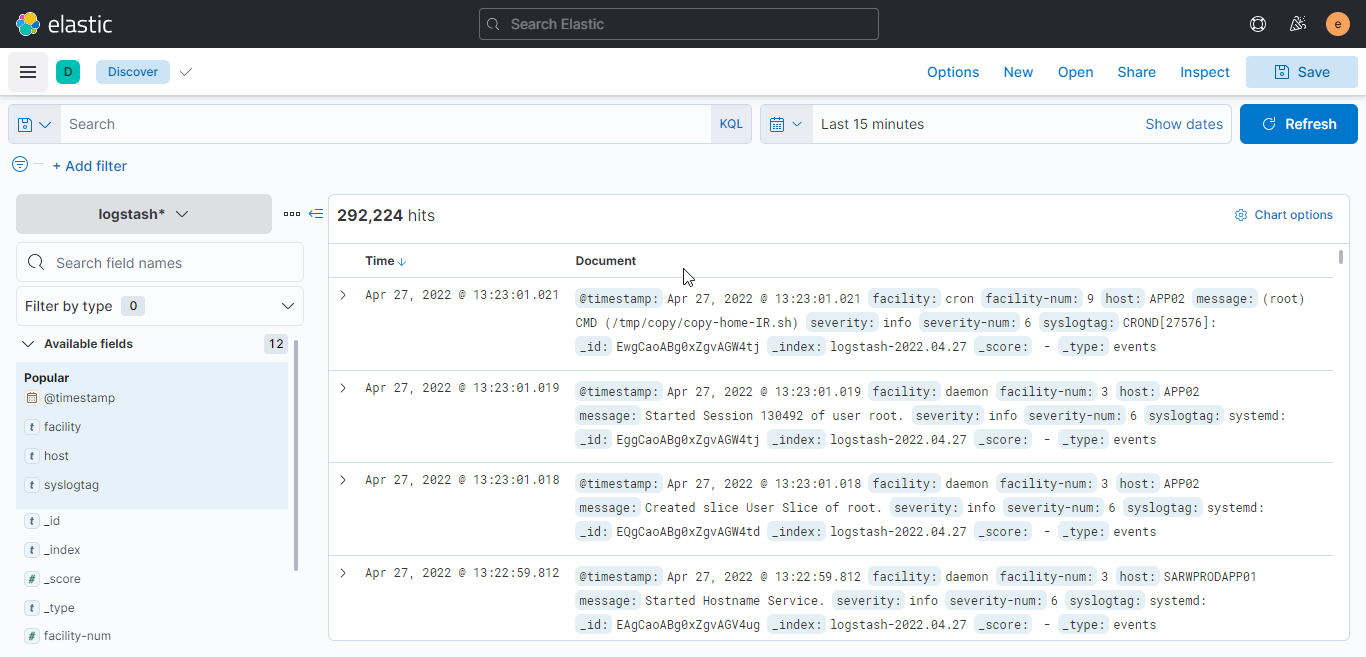
- After integration of ELK Stack with Rsyslog all the system logs. Ex: Messages, kernal logs, auth, maillog are sent to elasticsearch.
- Logs are visible on kibana portal and can be search with spacific date and log pattern.
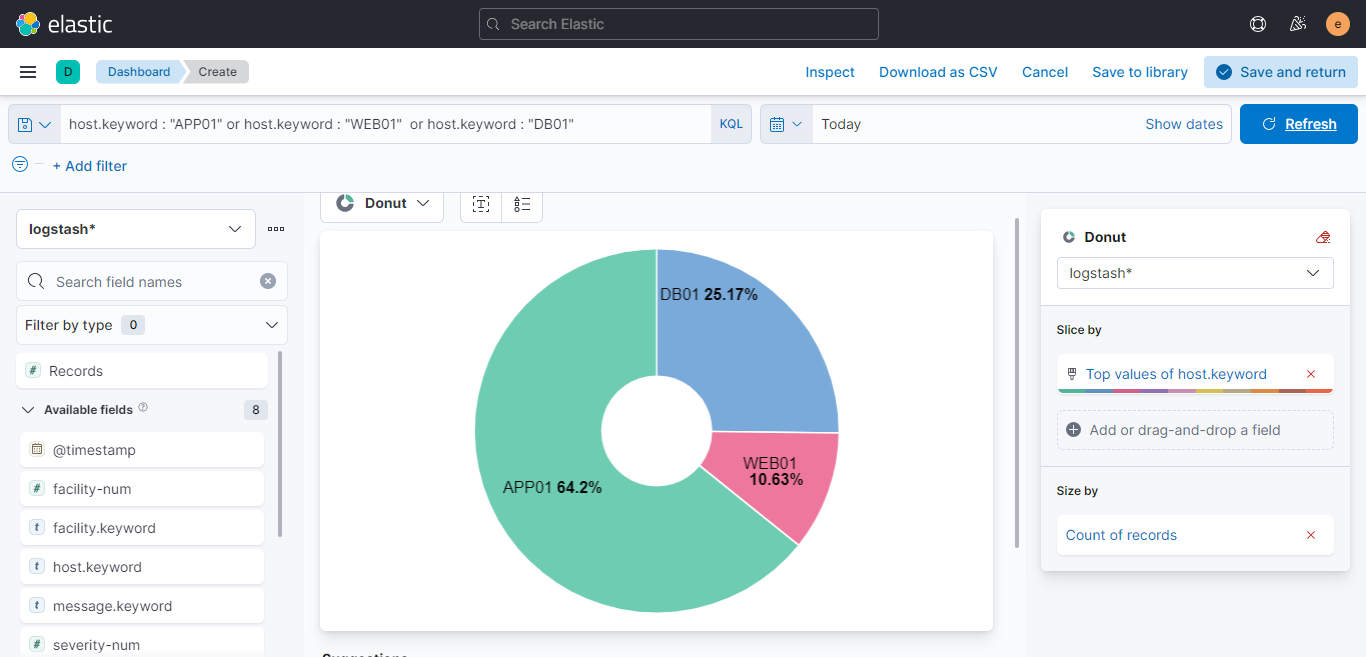
→ Screenshot


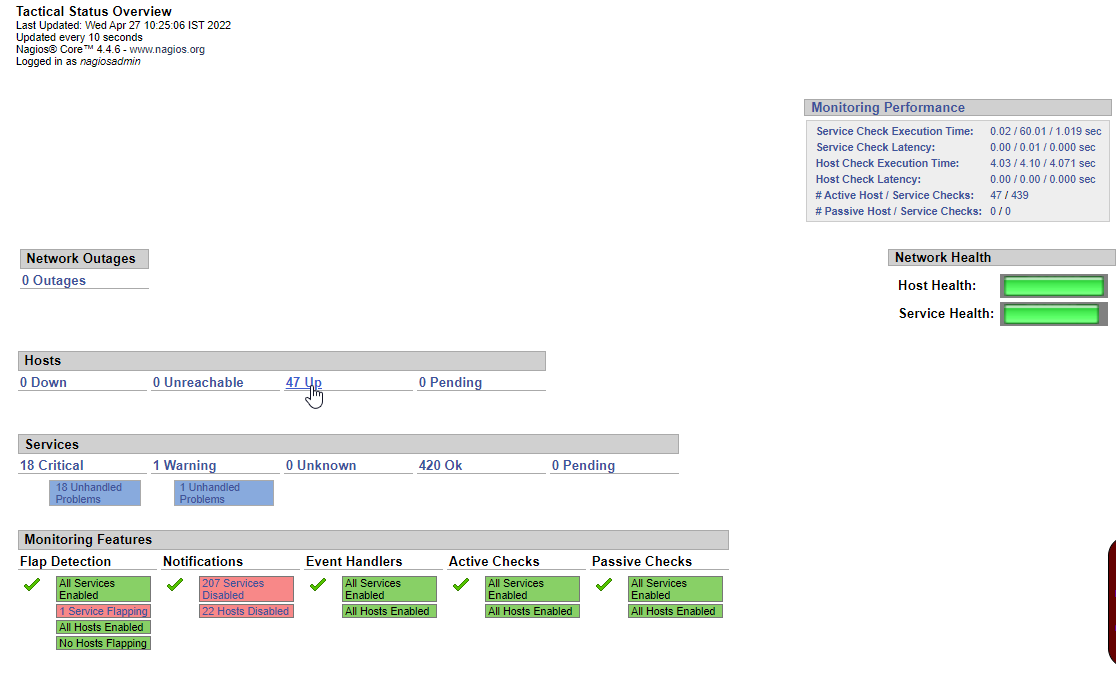
Project : Nagios Monitoring Systems

Chandan Singh
→ Project Details
First launched in 1999, Nagios has grown to include thousands of projects developed by the worldwide Nagios community. Nagios is officially sponsored by Nagios Enterprises, which supports the community in a number of different ways through sales of its commercial products and services.
Nagios monitors your entire IT infrastructure to ensure systems, applications, services, and business processes are functioning properly. In the event of a failure, Nagios can alert technical staff of the problem, allowing them to begin remediation processes before outages affect business processes, end-users, or customers. With Nagios you’ll never be left having to explain why an unseen infrastructure outage hurt your organization’s bottom line.
What can Nagios help you do?
Windows Monitoring, Linux Monitoring, Server Monitoring, Application Monitoring, SNMP Monitoring, Log Monitoring and many other service.
Services of Nagios

Nagios XI provides monitoring of all mission-critical infrastructure components including applications, services, operating systems, network protocols, systems metrics, and network infrastructure. Hundreds of third-party addons provide for monitoring of virtually all in-house and external applications, services, and systems.

Nagios Log Server greatly simplifies the process of searching your log data. Set up alerts to notify you when potential threats arise, or simply query your log data to quickly audit any system. With Nagios Log Server, you get all of your log data in one location, with high availability and fail-over built right in. Did we mention no data limits?

Nagios Fusion offers your network a high degree of visibility and scalability, helping solve problems that come with multiple networks and geographical separation. By allowing you to visualize multiple Nagios XI and Core servers in one location, network management becomes simplified by centralization.
→ Prerequisite
- Unix Based Enterprise Server
- HTTPD
- Nagios Agent & Plugins (NRPE)
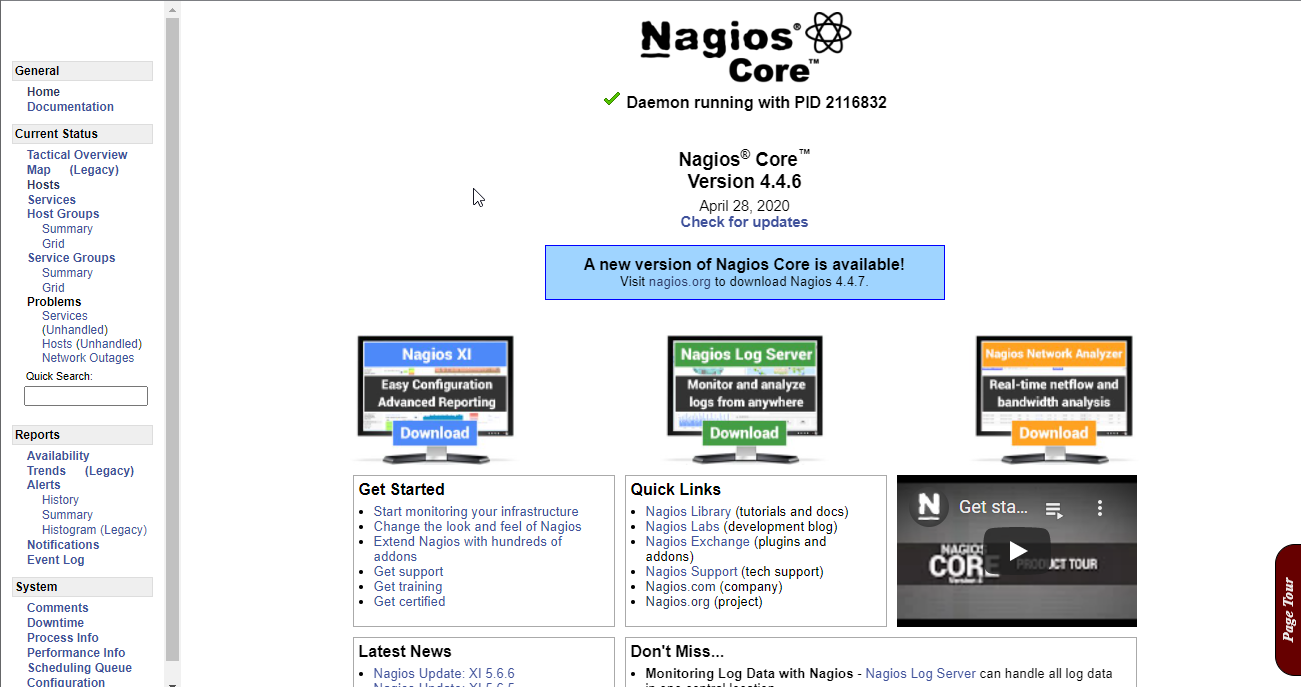
→ Screenshot
Project : Private GITLab

Manjiree Chaware
→ Project Details
Why Use GitLab?
The main benefit of using GitLab is that it allows all the team members to collaborate in every phase of the project. GitLab offers tracking from planning to creation to help developers automate the entire DevOps lifecycle and achieve the best possible results. More and more developers have started to use GitLab because of its wide assortment of features and brick blocks of code availability.
Private GitLab
A private Git repository on GitLab can be accessed using either SSH or HTTPS. The preferred method is to always use SSH and a SSH key pair. Only use HTTPS if you have no choice.
The first step to using a private Git repository on GitLab using a repository SSH key is to generate the SSH key pair to be used with that repository. It is recommended to use a distinct SSH key pair for this purpose. Do not use your primary identity SSH key as you will need to upload the private key file of the SSH key pair to OpenShift.
→ Prerequisite
- CentOS Linux 7.9
- Database
→ Summary
Implemented private GitLab so project code is not accessible by internet.
Project : User Authentication Using GCPW (Google Credential Provider for Windows)

R. D. Pawan
→ Project Details
What is GCPW?
Google Credential Provider for Windows® (GCPW) lets users sign in to Windows® devices with the Google Account that they use for work. GCPW provides users with a Single Sign-On experience to Google services and all the security features available with their Google Account.
→ System Requirements for Installing GCPW
- Windows 10 Pro, Pro for Workstations, Enterprise, or Education version 1803 or later
- Chrome Browser version 81 or later (stable version), installed with admin privileges
- Available disk space for Google Chrome (100 MB) and GCPW (3 MB)
- You need administrator privileges on the device to run the installer, or you can deploy the installer to devices using software deployment tools.
→ Prepare to install GCPW
Before you install Google Credential Provider for Windows (GCPW) on devices, you need to decide how passwords are synchronized between Google and Windows, give your support team access to devices, and determine how you want to handle existing Windows profiles
- Step 1. Decide on a password management strategy
- Step 2. Make password complexity levels compatible
- Step 3. Decide how to manage GCPW settings
- Step 4. Associate users Google Accounts with existing Windows profiles
- Step 5. If using Windows device management, give your support team access to devices
- Step 6. If using Windows device management, plan automatic enrolment
→ Install GCPW
- Step 1. Download GCPW from Admin Console
- Step 2. Set GCPW allowed domains and optional settings
- Step 3. Install GCPW
- Step 4. Manage GCPW devices
→ Screenshot

Project : ERP Salesforce

Abhijeet Sontakke
→ Project Details
What is ERP?
Enterprise Resource Planning (ERP) is software used by organizations to integrate multiple business functions into one system. It includes various activities, such as accounting, human resources, project management, sales, inventory and order management, and compliance.
How Salesforce supports ERP?
Salesforce provides customer relationship management software. Salesforce offers various business solutions, which can be integrated to enhance and support ERP but it does not provide an ERP product.
Salesforce offers Revenue Cloud, designed to complement ERPs. Part of the Salesforce Customer 360 Platform, Revenue Cloud brings together Configure, Price, Quote (CPQ) and Billing, Partner Relationship Management and B2B Commerce capabilities. Revenue Cloud is not an ERP and works best when integrated with an ERP.
Salesforce’s MuleSoft also makes it easy to integrate CRM, ERP, and other applications.
What is Mulesoft?
The MuleSoft Anypoint Platform helps businesses integrate data and connect experiences from any system. With MuleSoft, you can bring data from any third-party system such as SAP, Oracle, Workday into Salesforce.
Running enterprise resource planning software on the Salesforce Cloud Platform saves you time and money by providing a unified, integrated platform that supports your entire business.
→ Prerequisite
- Salesforce - (Enterprise/ Professional Editions)
- Salesforce Revenue Cloud
- Salesforce Customer 360 Platform
- Salesforce Mulesoft
→ Summary
- A single data model for CRM and ERP that gives you a complete view of your customers.
- Increased collaboration between employees, customers, and suppliers.
- Low code application development.
- Mobile access anytime and anywhere.
Project : Order Management System

Rohit Gajbhiye
→ Project Details
Provide digital experience to customer using Salesforce-Platform where we can manage sales and purchase orders, create packages and shipments, and send delivery updates through a single order management system. It automates order fulfilment, payment capture and invoices with supply chain workflows.
→ Functionalities for end user:
User will be able to
- search the product by name and category
- place, return and cancel an order
- add/edit/delete the address book
- log a case for any issues and check the status
- track the order status without log-in into the system
- chat with the support agent
- see FAQs without login
- use payment Gateway technology to pay order amount (Using by Integration Payment Gateway)
→ Functionalities for Internal user:
User will be able to
- see the cases and work on those
- see the knowledge article and then attach those articles to that case
- work on Orders and Edit those order record
Here, we can achieve the above functionality using salesforce platform.
Experience cloud user licenses are required for external users:-
The following licenses are used for external users as per requirement: Customer Community, Customer Community Plus, Partner Community, External Identity and Channel Account.
→ Prerequisite
- Salesforce - (Enterprise/ Professional Editions)
- Salesforce Cloud
- Experience Cloud user licenses for external user
→ Summary
- Add items, customers, sales and purchase orders in a single system to stay organized.
- It can help you manage and service orders before, during, and after fulfilment.
- The order fulfilment process streamlines the allocation, assignment, picking, packing, and shipment of order items.

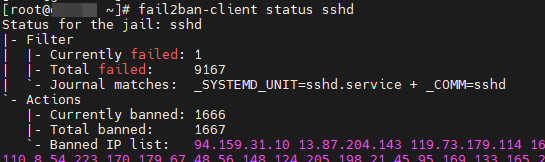
Project : Linux security: Protect your systems with fail2ban
Setup an IPS (Fail2ban) to Protect from Different Attacks
Akshay Haste
→ Project Details
What is IDS and IPS?
Intrusion detection is the process of monitoring the events occurring in your network and analyzing them for signs of possible incidents, violations, or imminent threats to your security policies. Intrusion prevention is the process of performing intrusion detection and then stopping the detected incidents. These security measures are available as intrusion detection systems (IDS) and intrusion prevention systems (IPS), which become part of your network to detect and stop potential incidents.
How fail2ban works ?
Fail2ban is an Intrusion Detection/Prevention System (IDS/IPS), a great tool that helps you keep “unwanted” guests at bay. It’s mainly used to stop, prevent or slow down bruteforce attacks, but can be used to limit the number of requests per unit of time (backend, API,..). It scans/monitor log files and bans IPs that show malicious signs, like too many password failures, probing, bruteforcing attempts, etc. You can specify which service and log to monitor, how many attempts per unit of time (second/hour…), define regex (regular expression) patterns, etc. Out of the box it comes with filters for various services: Apache, ssh, nginx, asterisk, proftp, mysql… Here we’ll quickly go through Fail2ban setup.
→ Prerequisite
- CentOS Linux 7.9
→ Summary
Fail2ban scans log files (e.g. /var/log/apache/error_log) and bans IPs that show the malicious signs -- too many password failures, seeking for exploits, etc. Generally Fail2Ban is then used to update firewall rules to reject the IP addresses for a specified amount of time, although any arbitrary other action (e.g. sending an email) could also be configured. Out of the box Fail2Ban comes with filters for various services (apache, courier, ssh, etc).
Fail2Ban is able to reduce the rate of incorrect authentications attempts however it cannot eliminate the risk that weak authentication presents. Configure services to use only two factor or public/private authentication mechanisms if you really want to protect services.
→ Screenshot


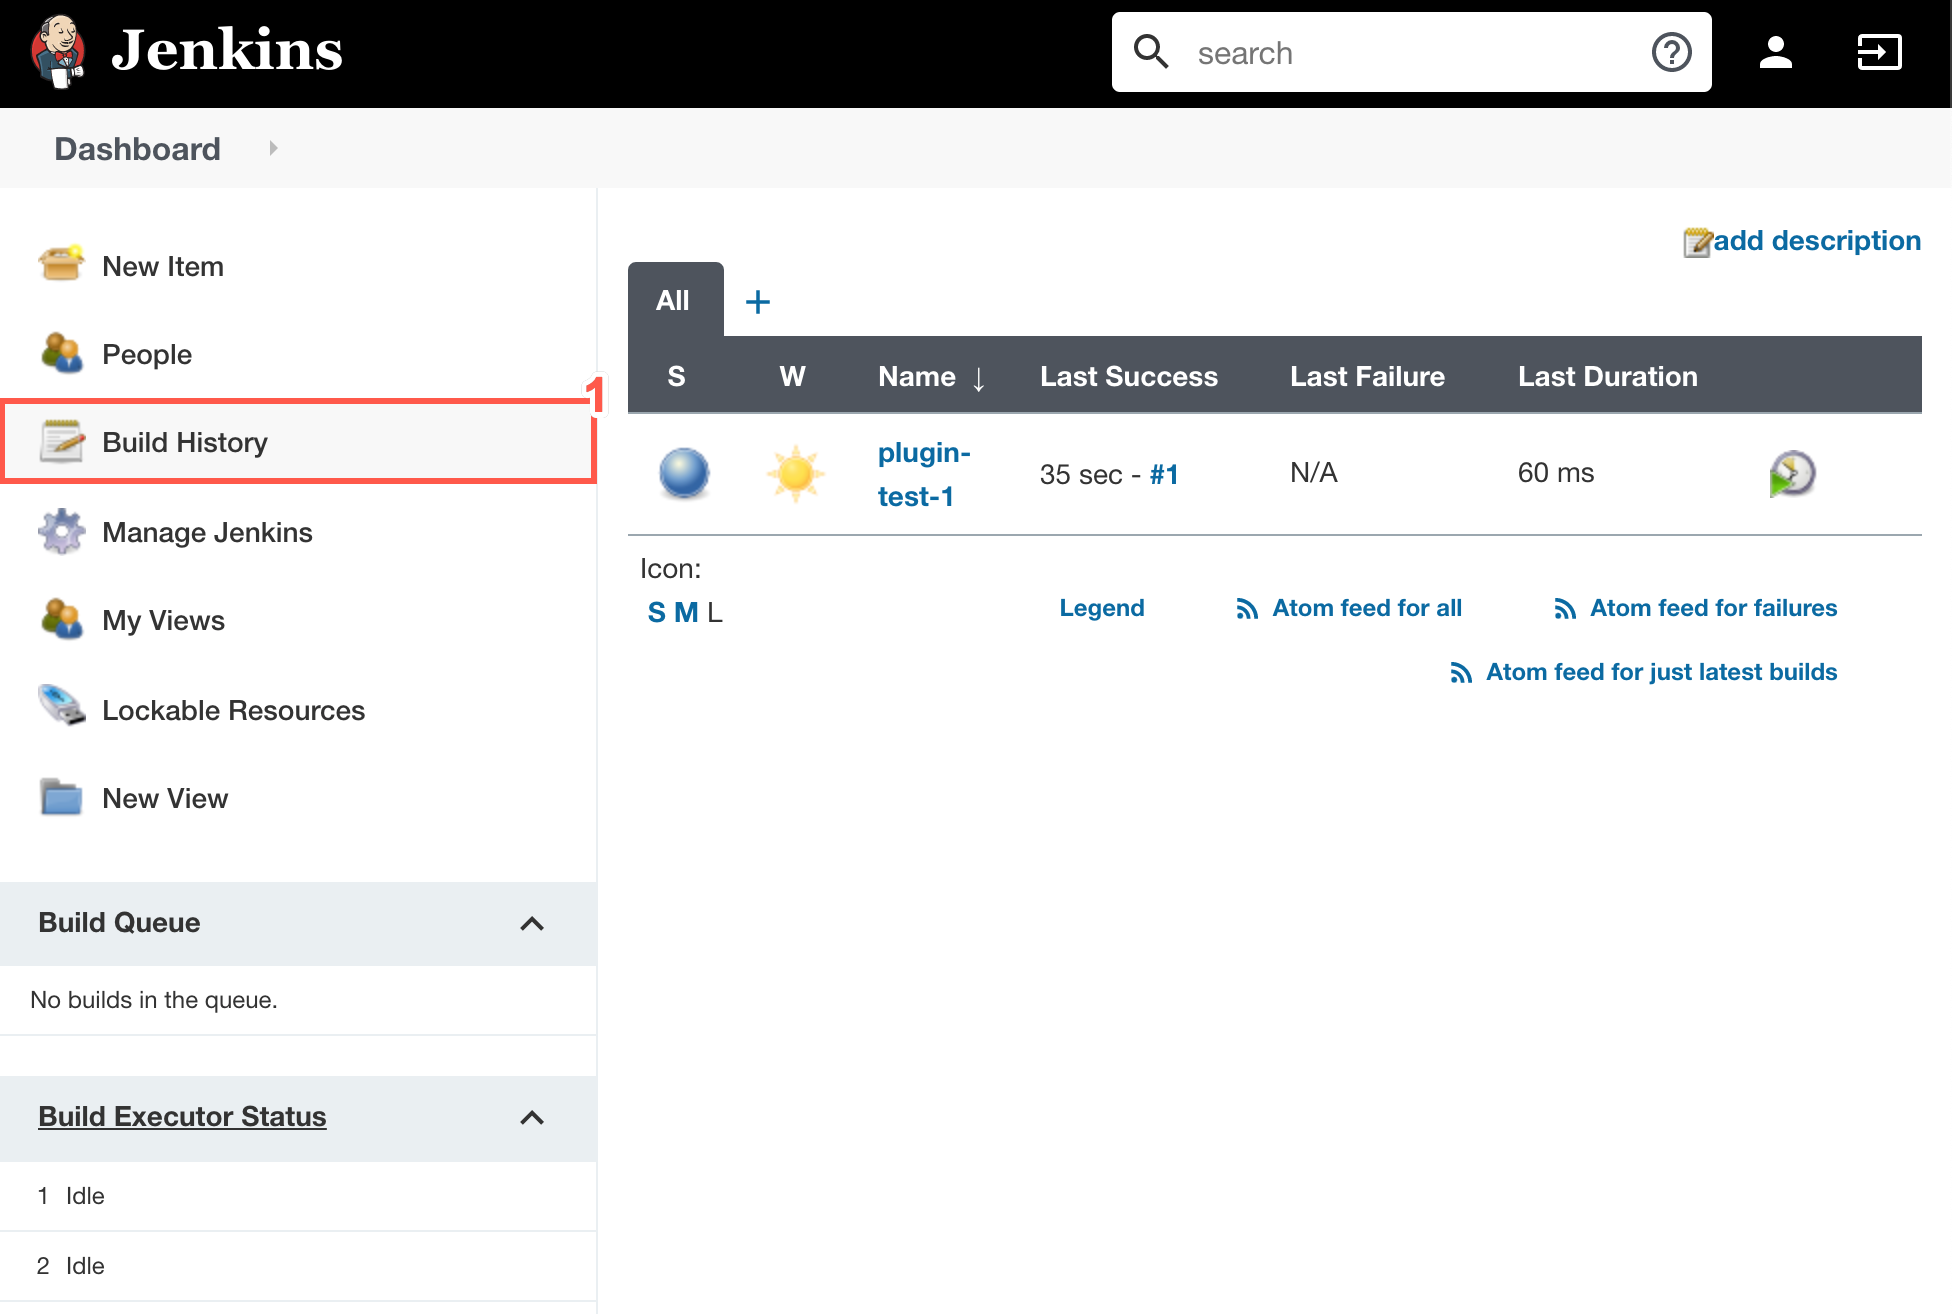
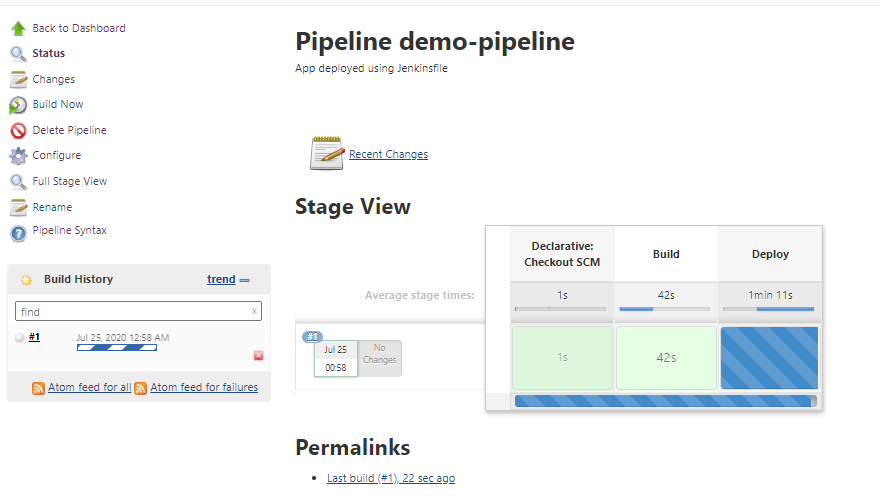
Project : CI/CD Pipeline using Ansible Docker
DevOps:
Manjiree Chaware
→ Project Details
DevOps is both a new way of thinking and a new way of working. It is reshaping how organizations innovate and quickly deliver positive business outcomes. DevOps describes a culture and set of processes that bring development and operations teams together to complete software development.
Why is CI/CD important?
CI/CD allows organizations to ship software quickly and efficiently. CI/CD facilitates an effective process for getting products to market faster than ever before, continuously delivering code into production, and ensuring an ongoing flow of new features and bug fixes via the most efficient delivery method.
Continuous integration
Continuous integration refers to the build/integration stage of the software release process. It’s a stage where developers consistently merge their changes into the main repository of a version control system (like Git).
Continuous delivery
Continuous delivery (CD) is the automated delivery of completed code to environments like testing and development. CD provides an automated and consistent way for code to be delivered to these environments.
Continuous deployment
Continuous deployment is the next step of continuous delivery. Every change that passes the automated tests is automatically placed in production, resulting in many production deployments.
→ Prerequisite
- CentOS Linux 7.9
- Jenkins
- Docker
- Ansible
- Git
→ Summary
DevOps automation can provide consistency across repetitive tasks through configuring an automation tool, and removing the threat of human error. It can increase the speed of the team from code integration to application deployment. It also creates a much more reliable and stable system due to the improved collaboration. This also sees a reduction in errors from miscommunication.
→ Screenshot
Project : Enable MFA-Delete on s3 bucket

Samir Maske
→ Project Details
Project Details
With many different services that exist in the cloud, security is a top priority of any organization. Therefore, protecting data with accidental delete also should be included in the top list of operations. In AWS S3 you can optionally add another layer of security by configuring buckets to enable MFA Delete, which can help to prevent accidental bucket deletions and it’s content.
What MFA-Delete exactly do
MFA-delete protect your bucket and object from accidental deletion.
When you try to enable MFA-Delete on s3 bucket you must login with root account not by IAM user Account.
→ Prerequisite
- You need to have one bucket of specific unique name.
- Inside bucket properties bucket versioning must be enabled.
- MFA( Multi-factor Authentication ) must be configured by root account using your mobile device such as Google Authenticator app.
- You need to CLI(command line interface ) to work.
→ Prepare to Enable MFA-Delete
- To configure AWS on command line interface(CLI) first by using Access Key Id & Secret Access Key of Root Account.
- To check all bucket in your s3 service aws s3 ls
- 3) To check Versioning is Enabled or not in CLI mode use command
aws s3api get-bucket-versioning --bucket {BucketName} - Enable MFA-Delete use command
aws s3api put-bucket-versioning –{bucket-name} --versioning-configuration Status=Enabled,MFADelete=Enabled --mfa “arn:aws:iam::00000000:mfa/root-account-mfa-device 123456”
→ Summary
- When you try to delete Bucket it give error.
- Without disable MFA-Delete you can’t delete bucket.
→ Screenshot

